Almost 5 years after my last post (yikes, how time flies), I have resurfaced to write a bit about the Ethereum development environment I've been using.
My primary goal in setting up any development environment is that it should be consistently replicable, and ephemeral (i.e., I should be able to tear the whole thing down and get it back up again in just a couple of easily-documented steps). It shouldn't matter where I'm developing or what computer I'm using; whether I've just factory reset my computer, or I'm onboarding a new developer, I should be able to enter a couple of commands and develop in exactly the same environment, as free as possible of "it works on my machine" syndrome. If the environment is updated in one place, it should be as simple as possible to update it in all the others too.
To that end, I've been using VS Code's Remote Containers. This allows me to store the entire development environment's configuration as version-controlled code. This provides the huge benefit of being able to use a Git repository as the authoritative source of truth of the entire environment.
Developing in Docker containers usually has a number of gotchas (Unix file permissions mostly), but VS Code works around these nicely, ensuring that the file permissions inside your workspace don't affect the permissions on your host rig. It also makes it easy to run as a non-root user, even if you are extending an existing Docker environment (look at multistage builds for some ideas on how to extend an existing Docker build environment for development).
So, what are we going to do?
A fairly standard setup for an Ethereum development environment is Hardhat, which is a fully featured Ethereum development environment designed to be flexible, extensible and make it as easy as possible to debug. The ability to debug & test effectively is even more critical when developing Smart Contracts than it is in many traditional software development workflows, given the complexity of upgrading, and the incentive for bad actors to find ways to circumvent your carefully considered algorithms. My experience with Hardhat has been very positive, so that's what we'll be using as a base. But this guide should be relatively easily portable to your Smart Contract development environment of choice.
I tend to use either MacOS or WSL2 for developing software, so the commands in this guide will be tailored for *nix type systems. It's absolutely possible to use a pure Windows environment for this too, and many of the commands will work fine in PowerShell - but others you might need to tweak a bit.
Ok, how do we do it?
Step 1 - Scaffold the environment
First, create a new folder, initialise it as a Git repository and open VS Code:
mkdir eth-dev-environment
cd $_
git init
code .
Now, we need to create a NodeJS devcontainer. We do this by pressing Shift+Ctrl+P on Windows, or Cmd+Shift+P on Mac; then we can type "add dev" into the search box to show the "Add Development Container Configuration Files" option.

Now type "node" into the subsequent search box, and the standard "Node.js & Typescript" definition, then choose the latest version available, based on the instructions in the field. I'm using Ubuntu 20.04 on WSL2, and at this time the latest stable version is "16", so I choose that.
I don't need any additional features for my dev container, but if you feel like any of the options that it gives you would be useful, knock yourself out - they shouldn't affect the rest of the setup.
When you press OK, this will create a folder called .devcontainer inside your repository, and ask if you want to reopen the folder in the container as seen below. Before we do this, we'll quickly add a useful extension to the container - Solidity language support. Open .devcontainer/devcontainer.json in your editor, and add juanblanco.solidity to the extensions array so it looks like this:
    "extensions": [
        "dbaeumer.vscode-eslint",
        "juanblanco.solidity"
    ],
If you miss the notification at the bottom right while you're updating the extensions, don't worry - you can just open your command palette again and search for "reopen" to see the "Remote Containers: Reopen in Container" option.

This will probably take a short while the first time. You can see verbose progress by tapping the "show log" notification in the bottom right. It'll be a lot quicker on subsequent runs - it just has to pull the containers and set them up the first time you spin up the environment. When you get into the container, it'll probably show you the output of the container setup terminal window, so press the "+" icon near the top right of the bottom panel to bring up a new terminal window.
Once you've found your way into your terminal window, initialise a NodeJS project with yarn init and fill out the information to your requirements.
Step 2 - Install Hardhat & compile your first Smart Contract!
To install Hardhat, we add it as a dev dependency of our project:
yarn add --dev hardhat
And then we initialise it by running the following command, inside our workspace:
npx hardhat
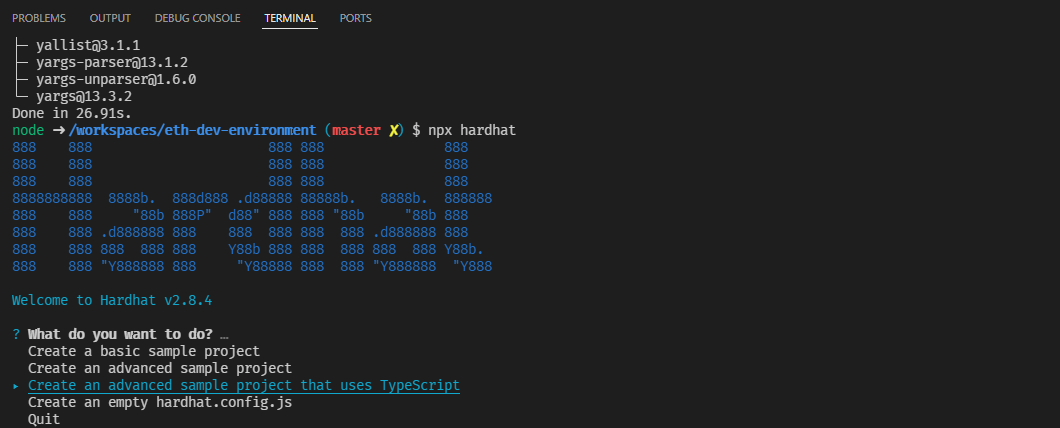
This will give us a number of options. We're just running through a demo, so we'll choose "Create an advanced sample project that uses Typescript".

You should almost certainly choose to add a .gitignore, but for the rest of the options you can either select all the default options from here, or configure them to your requirements. You'll now see tons of stuff scrolling through your terminal, and when it finishes, you'll have your development environment fully initialised. The sample project comes with a Greeter contract defined in contracts/Greeter.sol, and a unit test which shows a brief example of how you can assert that your contract behaves as it should. The Greeter contract is super simple, and is defined as follows:
//SPDX-License-Identifier: Unlicense
pragma solidity ^0.8.0;

import "hardhat/console.sol";

contract Greeter {
    string private greeting;

    constructor(string memory _greeting) {
        console.log("Deploying a Greeter with greeting:", _greeting);
        greeting = _greeting;
    }

    function greet() public view returns (string memory) {
        return greeting;
    }

    function setGreeting(string memory _greeting) public {
        console.log("Changing greeting from '%s' to '%s'", greeting, _greeting);
        greeting = _greeting;
    }
}
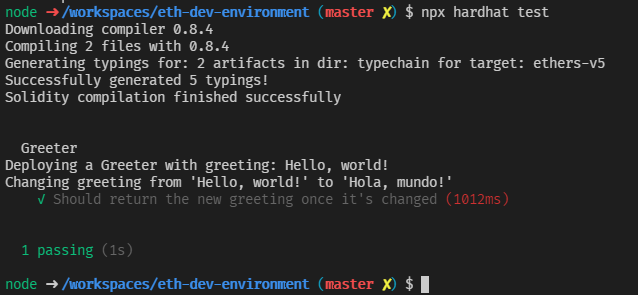
To confirm that your environment is capable of compiling this and that it does do what it's expected to, run npx hardhat test in your Development Container's terminal window, and you should see Hardhat automatically downloading the correct version of solc, then the test passing. You will also see some other output, generated by Hardhat's console.log function (imported at the top with import "hardhat/console.sol"). This is an immensely useful feature of Hardhat, providing a streamlined way to analyse what's going on at each stage of your contract's execution.

Now that we've proven that our environment works as expected, we'll commit it, ready to start working on our Smart Contracts.
git add -A
git commit -m "Initial commit"
I've pushed the environment we've built to a Github repository for your convenience. We'll be using this environment as a base in some future articles where we'll start to learn how to use our new Hardhat development environment to complete some online Solidity security challenges.
For now, have fun!

